As a Profiler (or certified SEI Assessor), you create a PROJECT to provide the link for your clients to take the assessment to generate one of the Brain Profiles. Step-by-step guide- Log in to Tools system: https://tools.6seconds.org
- If you have a Profiler account, after logging in, it will look something like this ("Certified Assessor" accounts have more options) – click on the link: Create a project
(or Youth for a project for people under 18 years old)
 Image RemovedOnce logged in, click on the SEI tab to see your projects. If you are looking for a youth project click on the sub tab "SEI YV". Image RemovedOnce logged in, click on the SEI tab to see your projects. If you are looking for a youth project click on the sub tab "SEI YV".
 Image Added Image Added - Click Add Project at hte top of this page.
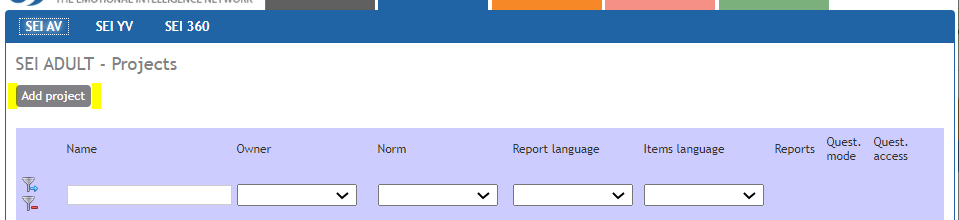 Image Added Image Added You will see a form to edit your project. | Info |
|---|
You do not need to change any of the settings – if you want, just scroll down and click Save and go to step 4  |
On the form, you can change the project name and other settings:


When you are done, click SAVE.
Note: See where it says "start from: immediately"?
You can put a date here, and the system will WAIT for that date before it starts emailing Profiles (ie, the results of the questionnaire... not the date the questionnaire is sent).

This is useful if you want everyone in your group to get the Profiles at a certain point, for example, if you have a pre-meeting where you are explaining the Profiles on April 27, and you set it like above, and tell them, "Tomorrow, you'll receive your Profiles automatically"
The system will generate a special link for your project – with an ID# that tells the system, "This link matches this project!"

- You copy the link and email it to your clients.
When your client clicks the link you emailed, they will take the questionnaire, and the system will process your Profiles according to the settings above.
Voila!
Related articlesHere is an article about Block or Enable Emailing of Reports – for this part of the project setting: 
Plus.... | Filter by label (Content by label) |
|---|
| showLabels | false |
|---|
| max | 5 |
|---|
| spaces | TK2 |
|---|
| showSpace | false |
|---|
| sort | modified |
|---|
| reverse | true |
|---|
| type | page |
|---|
| cql | label in ( "profile" , "sei" ) and type = "page" and space = "TK2" |
|---|
| labels | profile sei |
|---|
|
Cómo Crear un Proyecto de Perfiles del CerebroLos usuarios de los perfiles (o Asesores Certificados en SEI), pueden crear PROYECTOS para enviar el enlace de la evaluación a sus clientes y generar un Perfil del Cerebro. Paso a Paso:Los pasos sugeridos: - Entrar a la intranet de Tools: https://tools.6seconds.org
- Si tienes un cuenta para de Profiler account, una vez que te registres vas a encontrar una pantalla que luce de esta manera: (los "Asesores Certificado") verán más opciones en su pantalla -- dar click en el enlace : Create a project
(o Youth (Jóvenes) para proyectos relacionados con jóvenes menores de 18 años)
Encontrás un formato editable para personalizar tu proyecto. | Info |
|---|
Si no requieres hacer cambios adicionales – ve a la parte inferior de la pantalla y dale clic en Save para ir al paso 4 |
Dentro del formato, es posible cambiar el nombre del proyecto y otra información: Name: Colocar el nombre del proyecto que aparecerá en el Perfil, te ayudará a mantener una buena organización. Sección : Questionnaire Settings Items Language: En esta sección puedes cambiar el lenguaje del cuestionario a Spanish LAC Block unreliable assessments (Bloquear evaluaciones no confiables): Usualmente se recomienda dejar este casillero marcado. Encontrarás más información en el artículo al final de esta página. Block duplicate assessments (Bloquear evaluaciones duplicadas): Usualmente se recomienda dejar este casillero marcado. Encontrarás más información en el artículo al final de esta página. Sección: Reports Report Norm: Puedes escoger la norma que se utilizará para la puntuación: Spanish LAC Report Language: Buscar Spanish LAC. Reporte será emitido en Spanish LAC Report Type: En esta parte encontrarás una lista de los reportes disponibles según tu certificación. Puedes marcar los casilleros que apliquen a tu proyecto. Send to test taker: Al marcar este casillero, el reporte será automáticamente enviado a la persona que respondió el cuestionario. Send to coach: Marca aquí si deseas que te llegue una copia de este reporte. (Recomendado) Send to others: ¿Hay alguna persona adicional que necesita recibir este reporte? Si marcas este casillero, tienes la opción de ingresar manualmente su dirección electrónica. Start from: Es posible ingresar una fecha específica de cuándo será disponible la evaluación para tu cliente. Si no marcas este casillero, la opción permanecerá en "inmediatamente". Más información a continuación.
Una vez que hayas completado los pasos requeridos, dale clic a SAVE.
Nota: El espacio que dice "immediately" está señalado por default para enviar el cuestionario de inmediato.
Puedes ingresar una fecha aquí, y el sistema esperará para enviar el perfil en esa fecha. (i.e., es decir los resultados del cuestionario... o la fecha en que el cuestionario será enviado).
Esto es útil si deseas que todos los miembros de un grupo obtengan los perfiles en un determinado punto, por ejemplo, si tienes una reunión preliminar en la que estás explicando los perfiles el 27 de abril y lo has configurado como anteriormente dirá: "Mañana, recibirás tus perfiles automáticamente"
El sistema va a generar un enlace especial para tu proyecto– con un número de ID# que indicará: "Este enlace es el de tu proyecto"
- Copiar el link para enviarlo a tus clientes junto con tu mensaje personalizado.
Cuando tu cliente haga clic en el enlace que se envió por correo electrónico, tomará el cuestionario y el sistema procesará su perfil/es de acuerdo con los ajustes anteriores.
Voila!
VideoEste video te guiará para configurar un proyecto. Recuerda que cuando configures un proyecto en idioma español debes tener en cuenta que el lenguaje a elegir es Spanish LAC, y la sección del Reporte, debes elegir también la Norma en el menú Spanish LAC y el lenguaje del Reporte Spanish LAC. 
Artículos RecientesEste es un artículo acerca de cómo Bloquear o Permitir el Envío Electrónico de Reportes – para esta sección de como crear un Proyecto:
Y más ... | Filter by label (Content by label) |
|---|
| showLabels | false |
|---|
| max | 5 |
|---|
| spaces | TK2 |
|---|
| showSpace | false |
|---|
| sort | modified |
|---|
| reverse | true |
|---|
| type | page |
|---|
| cql | label in ( "profile" , "sei" ) and type = "page" and space = "TK2" |
|---|
| labels | profile sei |
|---|
|
In quanto Profiler (oppure SEI Assessor Certificato), si creano PROGETTI per fornire link ai propri clienti per permettere loro di fare i test e generare uno dei Brain Profiles. Guida step-by-stepAggiunta dei passaggi coinvolti: - Effettuare il Log in al sistema Tools: https://tools.6seconds.org
- Se si possiede un account Profiler, dopo il log in, apparirà qualcosa come questa (gli account "Assessor Certificato" hanno più opzioni) – fare click sul link: Crea un progetto
(oppure Youth per un progetto di persone sotto i 18 anni)
Apparirà un modulo per modificare il progetto. | Info |
|---|
Non è necessario cambiare nessuna delle impostazioni – se si desidera, basta andare in basso e fare click su Salva per andare allo step 4 |
Sul modulo, è possibile cambiare il nome del progetto e altre impostazioni:
Quando si finisce, fare click su SALVA.
Nota: si tenga presente il punto in cui è scritto "start from: immediately"
E' possibile mettere un data, e il sistema ASPETTERA' fino al momento giusto prima di mandare emails ai Profiles (per esempio, i risultati del questionario... non la data in cui il questionario viene mandato).
Questo strumento è molto utile se si vuole che ognuno nel tuo gruppo ottenga il Profile in un determinanto momento, per esempio, se si ha un incontro in cui vengono spiegati i profili il 27 Aprile, e si imposta come sotto, e si dice, "Domani riceverete automaticamente i vostri Profile"
Il sistema genererà un link speciale per il progetto preso in considerazione – con un ID# che dice che al sistema, "Questo link corrisponde al progetto!"
- Si copi il link e si mandi una email ai propri clienti.
Quando il suo cliente farà click sul link che gli arriverà per email, potrà fare il questionario e il sistema processerà il suo Profilo secondo le impostazioni sopra.
Voila!
Articoli correlatiEcco un articolo su come Bloccare o disabilitare le Email dei Report – per questa parta delle impostazioni del progetto:
Per saperne di più.... | Filter by label (Content by label) |
|---|
| showLabels | false |
|---|
| max | 5 |
|---|
| spaces | TK2 |
|---|
| showSpace | false |
|---|
| sort | modified |
|---|
| reverse | true |
|---|
| type | page |
|---|
| cql | label in ( "profile" , "sei" ) and type = "page" and space = "TK2" |
|---|
| labels | profile sei |
|---|
|
|